1. Teaming : 여러 개의 물리적 인터페이스를 하나의 논리적인 인터페이스로 구성
2. 물리적 인터페이스 = 슬레이브 = 포트 인터페이스
3. 인터페이스 묶음 = 마스터 = 팀 인터페이스
4. 포트 인터페이스 : 실질적으로 데이터가 이동하는 통로 역활
5. 티밍의 기본적인 목적 : 네트워크 인터페이스의 문제가 있어도 네트워크가 끊어지지 않고 연속성을 유지하는 것
< 참고사항>
8장. 네트워크 티밍 구성 Red Hat Enterprise Linux 8 | Red Hat Customer Portal
Access Red Hat’s knowledge, guidance, and support through your subscription.
access.redhat.com
8.3. 네트워크 티밍 및 본딩 기능 비교 Red Hat Enterprise Linux 8 | Red Hat Customer Portal
Access Red Hat’s knowledge, guidance, and support through your subscription.
access.redhat.com
8.5. nmcli 명령을 사용하여 네트워크 팀 구성 Red Hat Enterprise Linux 8 | Red Hat Customer Portal
Access Red Hat’s knowledge, guidance, and support through your subscription.
access.redhat.com
< 티밍 예제 사전 구성 >
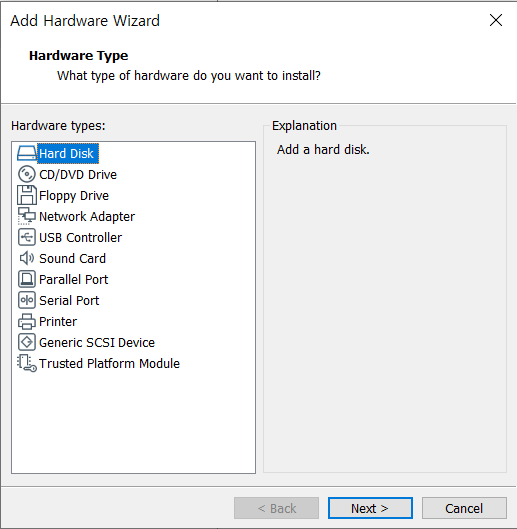
1. 네트워크 카드 2개 추가 장착(총 3개 장착)


2. 추가 장착된 네트워크 장치 목록 확인
# nmcli device status
# ifconfig
< nmcli(Network Manager Command Line Interface) 를 통한 구성 >
1. 팀 인터페이스를 생성(IP 주소 함께 설정)
# https://access.redhat.com/documentation/ko-kr/red_hat_enterprise_linux/8/html/configuring_and_managing_networking/comparison-of-network-teaming-and-bonding-features_configuring-network-teaming
- type : 네트워크 연결방식을 지정하는 항목
일반적인 네트워크 연결에서는 Ethernet 방식을 주로 설정하지 만 팀이 에서는 team 혹은 team-slave로 지정
- ifname : 인터페이스 이름을 지정해주는 항목
- con-name: 연결 이름을 지정해주는 항목
생략 이가 능한 항목이지만 설정 내용을 수정하거나 확인할때 사용할 연결 이름이기 때문에 지정하는것을
권장 만약 지정하지 않으면 인터페이스 이름에 따라 결정
- ipv4/gw4 : 해당 팀인터페이스 사용할 IP 주소를 지정
팀인터페이스를 생성할 때 IP 주소를 지정하면 IP 주소를 정적으로 설정하게 되고,
지정하지 않으면 동적으로 IP 주소를 설정
- config : 티밍에서 사용할 러너를 지정하는 항목
* 러너 : 트래픽 처리 방식을 결정해준ㄴ 것
* 데몬 : teamd
| 러너 | 설명 |
| broadcast | 모든포트로데이터전송 |
| roundrobin | 각포트로순차적데이터전송 |
| loadbalance | 부하분산방식의패킷전송 |
| activebackup | 장애조치를위한설정 |
| lacp | LACP(802.1ax) 구현(대역폭증가및장애조치) 스위치기능산의지원이필요 |
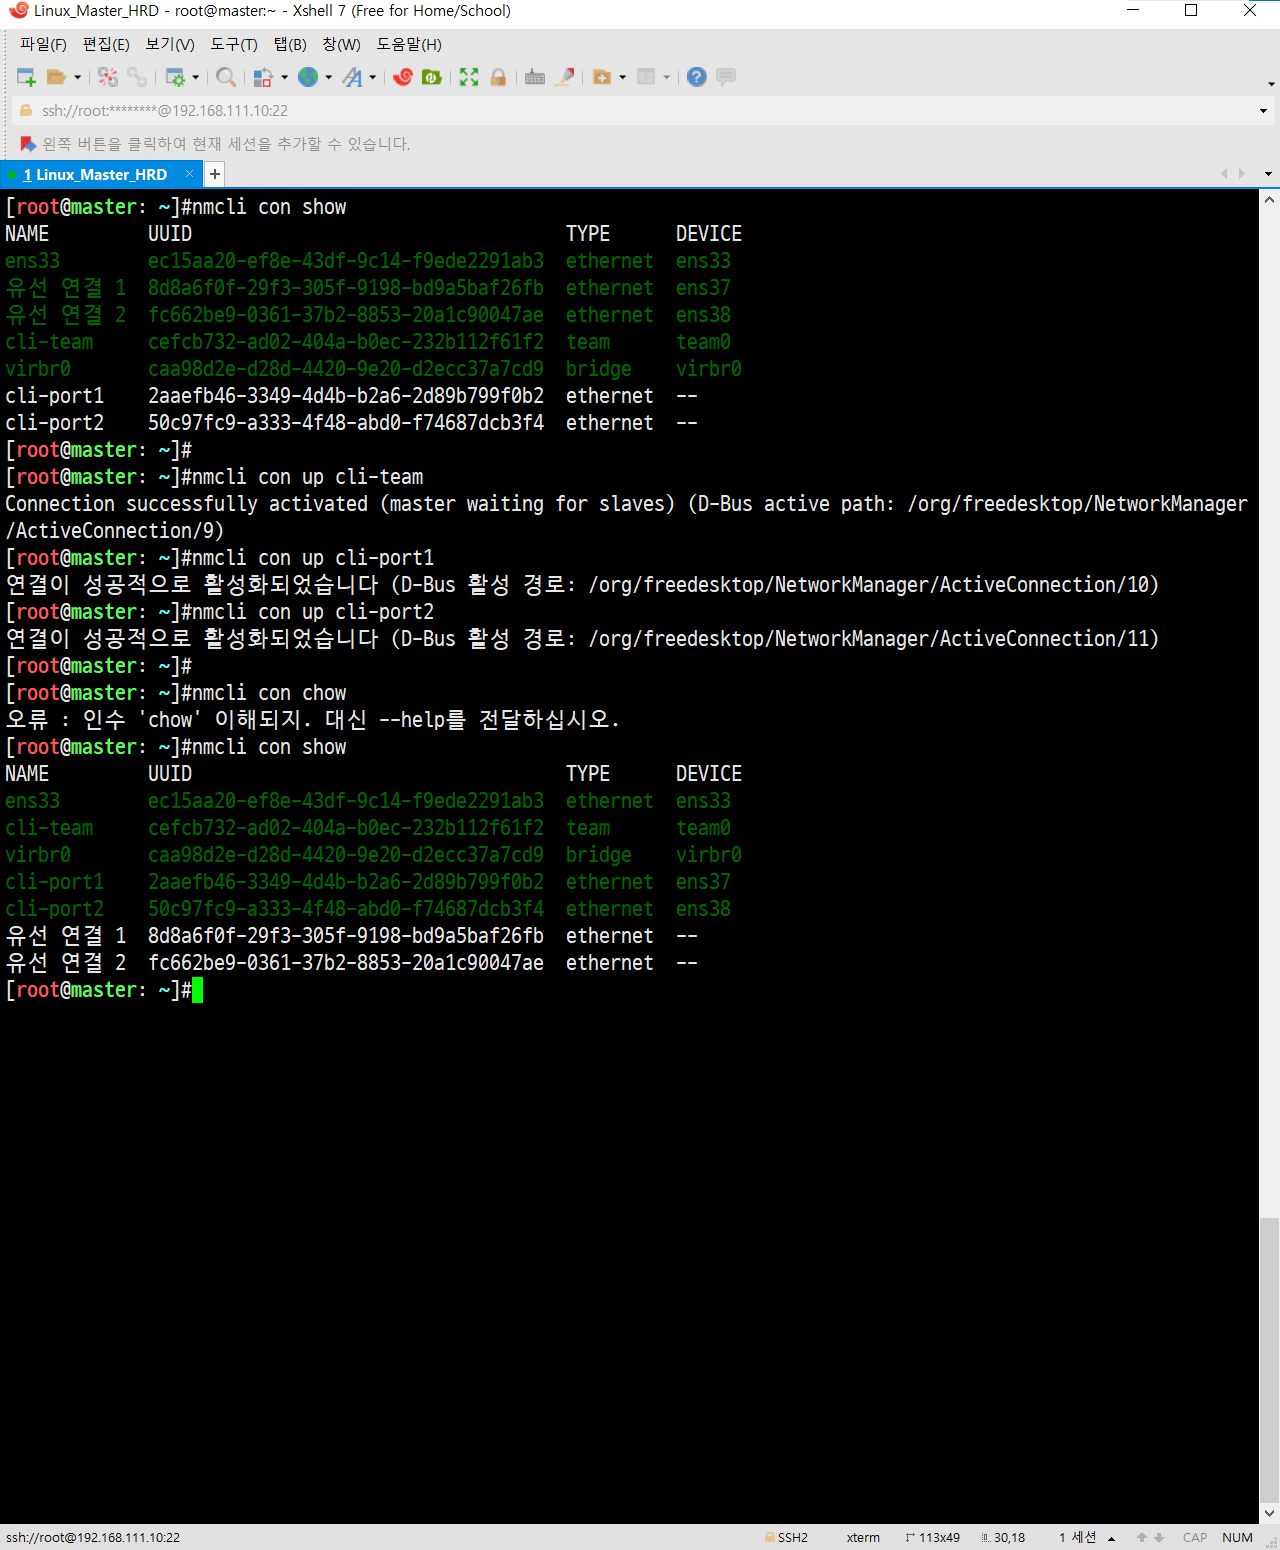
2. 팀 인터페이스 생성 후 확인
# nmcli con show
3. 팀 인터페이스 생성 후 이 인터페이스에 연결될 물리적 인터페이스인 포트 인터페이스 생성
# nmcli con add type team-slave con-name cli-port1 ifname ens37 master team0
# nmcli con add type team-slave con-name cli-port2 ifname ens38 master team0
4. 포트 인터페이스 생성 후 확인
# nmcli con show
5. 팀 인터페이스 / 포트 인터페이스 활성화 및 확인
- 팀 인터페이스 활성화
# nmcli con up cli-team- 포트 인터페이스 활성화
# nmcli con up cli-port1
# nmail con up cli-port2
- 활성화 후 확인
# nmcli con show
6. 전체 비활성화 및 확인
- 팀 인터페이스 비활성화
# nmcli con down cli-team- 비활성화 후 확인
# nmcli con show
- 팀 인터페이스를 활성화해도 포트 인터페이스는 활성화 되지 않음
- 포트 인터페이스를 활성화하면 팀 인터페이스는 함께 활성화
- 포트 인터페이스를 비활성화해도 팀 인터페이스는 활성화 상태
- 팀 인터페이스를 비활성화하면 모든 인터페이스들이 함께 비활성화
7. 팀 인터페이스 / 포트 인터페이스 삭제
- 팀 인터페이스 삭제
# nmcli con del cli-team- 포트 인터페이스 삭제
# nmcli con del cli-port1
# nmcli con del cli-port2
- 삭제 후 확인
# nmcli con show
'Network' 카테고리의 다른 글
| Port 점검 / netstat 점검 (0) | 2023.01.04 |
|---|---|
| NIC Teaming - 서버 랜카드 이중화 2 (0) | 2022.12.28 |
| [CiscoSwitch]장애 처리 절차 가이드 (0) | 2022.04.19 |
| [네트워크관리사]리눅스 명령어 단답형 족보 (0) | 2021.10.10 |
| [네트워크관리사]실기 족보 (0) | 2021.10.10 |


